Monday, March 26, 2012

We just had another wet storm roll through our neck of the mountains and it left us with six inches of wet snow.  Since I can't work on the trailer and am dead in the water when it rains...I thought I would post a few pics from our place.  I'll be starting the front restoration of the framing and paneling when it dries out.

This is the view from our front porch if I am using my 400 telephoto lens on the Canon.  We used to live up in the big trees before we moved down a little bit to have our horses on our property.  Never tire of the view...

Another view from a different angle

Making friends.....Fire and Annie

Yucca Bloom


Male Anna's Hummingbird

Riding out the storm....
I've got something on how to do the french Polish technique that I am working on and will update my progress on the frame and paneling rebuild.  Thanks for looking.

Tuesday, March 13, 2012


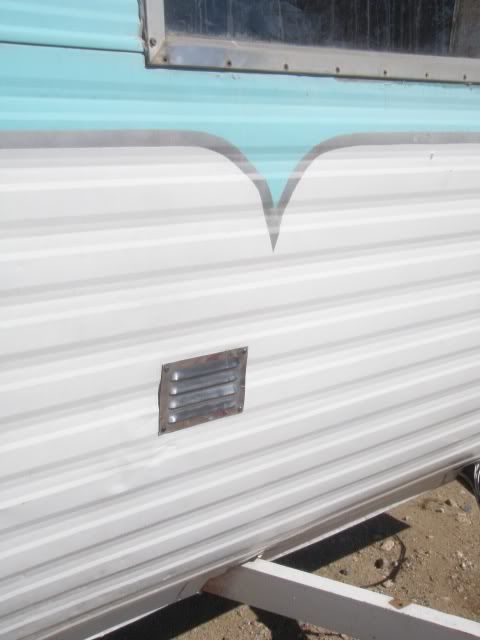
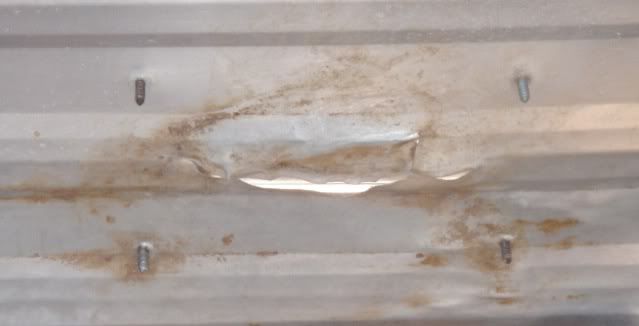
So I was walking around the Deville this morning after feeding and saw the screen the PO had put over the slash in the front tin.


I need to get that fixed before I button up the front end.  I plan on using some flashing metal...cut to a smaller size then the screen and placed on with screws and putty tape to keep the water from coming in.  Perfect scenario would be to put a whole new piece of tin but that 's not in the cards.  Maybe down the road.


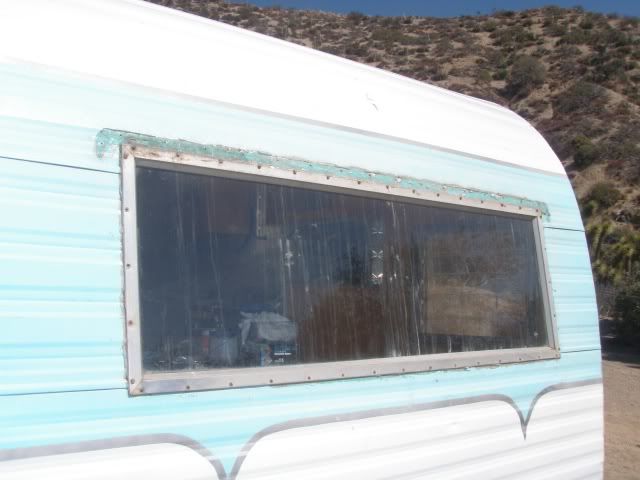
I also glanced at the window that has to come up and the hole cleaned of the residual silicone....the curse of restoration!  I need to get on that sooner then later.  There is simply no easy way to get that stuff off.


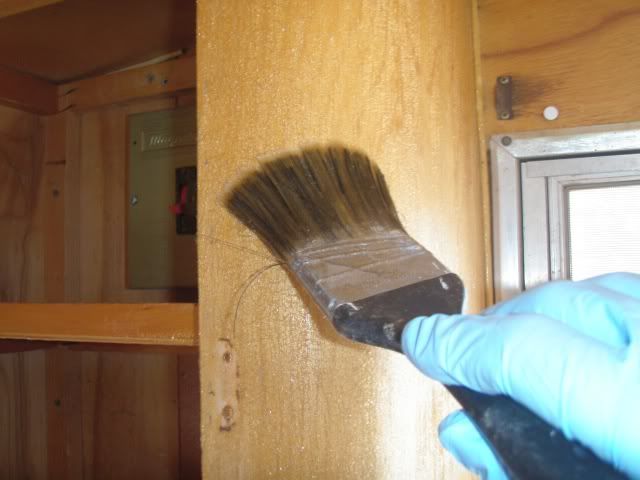
Been working on the interior cabinets while everything is torn up and being rebuilt.  Going pretty good and i learn something every day.  I am using Shellac and found a system that works for me.  I use a brush to get it on the wood and start by stripping the cabinets three times.

 I mask everything within a few feet or where I might slip and get this stuff on.


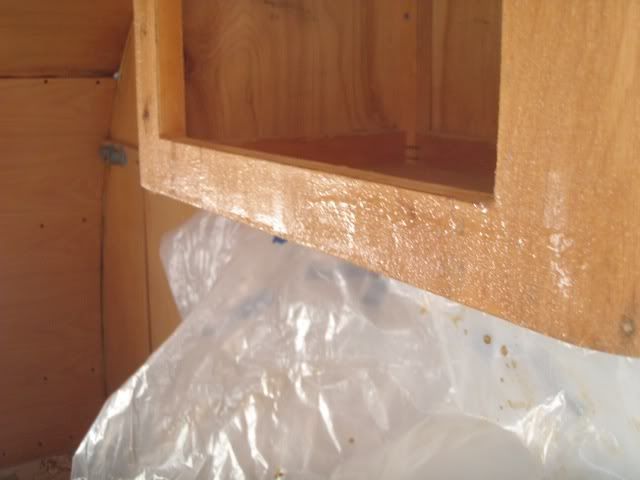
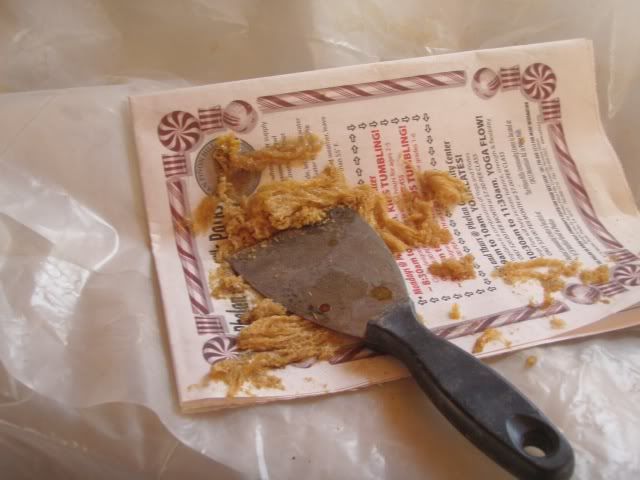
The stuff is wicked bad for you and I always getting it inside my gloves somehow.  Like having some pissed off red ants running around and biting your wrists.  I let it set for 15 minutes and scrap it off.


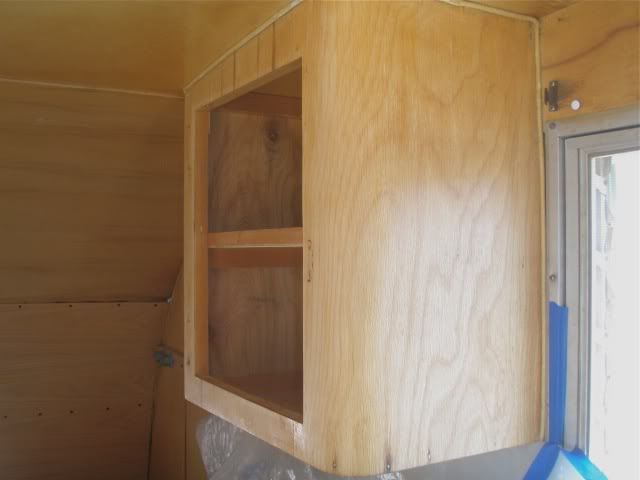
After the third time, I wash the wood with coarse steel wool and water.  It comes looking pretty clean.  A lot of these cabinets were incredibly dirty and scuffed but have cleaned up very well.  They also have rounded edges which I do not have the skills to reproduce so salvaging them was a priority.  I am very pleased with the results.


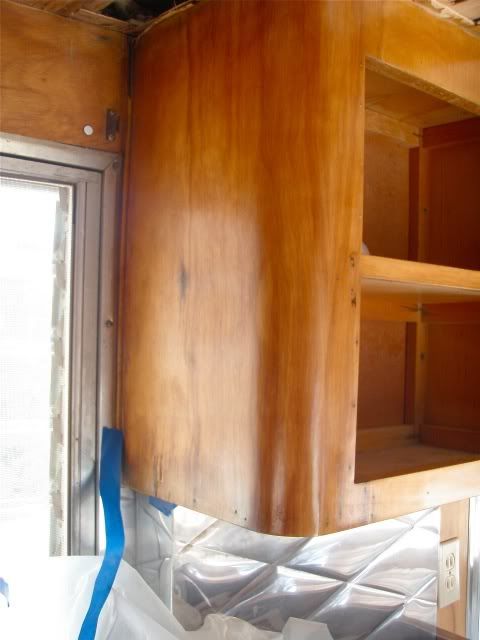
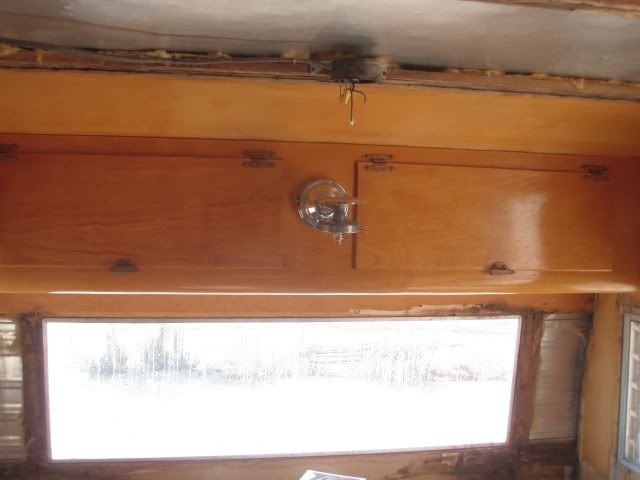
I'll let it dry for a day....sand it with 220 and start the Shellac.  I am putting a base coat of two to three coats of thinned Amber shellac and alcohol...almost 50/50.  I put that on with a brush.  When that dries well, I start doing what is called a French Polish technique or at least my version.  It is labor intensive but I am not on a timetable and I am very pleased with the results.  Here is the cabinet that is on the other side of the sink.


I cannot capture the depth and color of the cabinet with my point and shoot but it is almost like furniture.  No brush strokes.  This is only the Amber Shellac.  I begin using the clear shellac today and will build up even more.

Here's the cabinet that goes over the dinette.  We love our propane light!

I take a rag and fold it up and over another rag.  I pull the rag tight... like a baseball over the stuffing and dip it into the shellac and alcohol mixture and start rubbing.  The goal is to not feel any resistance and to put very thin layers down.  If it starts sticking very badly, I will put a drop of mineral oil on the rag to finish to area.  When that is done, I go over it with a drop or two of alcohol to "spirit it off".  Bottom line is that you can put coat after coat on as it dries in minutes.  Same process as used on guitars and violins.


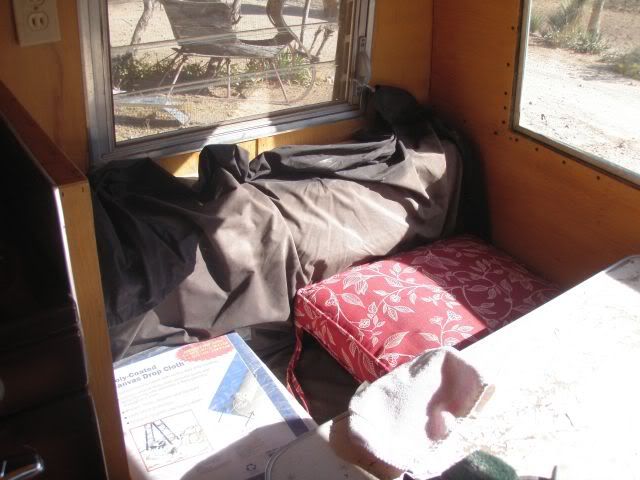
That's what I have been doing.  We have the dinette upholstery back and it turned out incredible.  Can't wait to get them back in.  Here's a  before picture of the dinette:


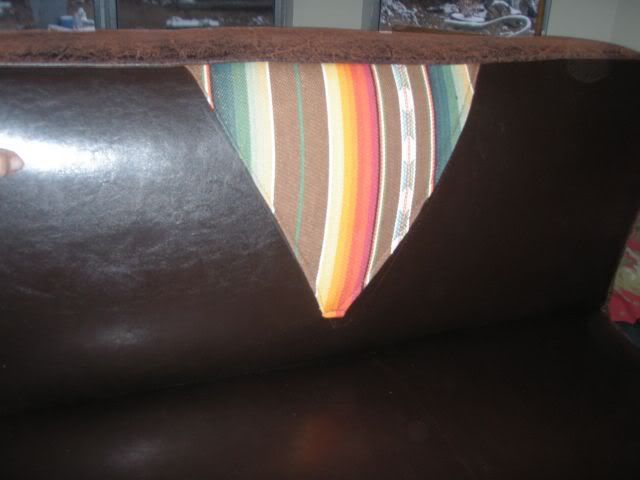
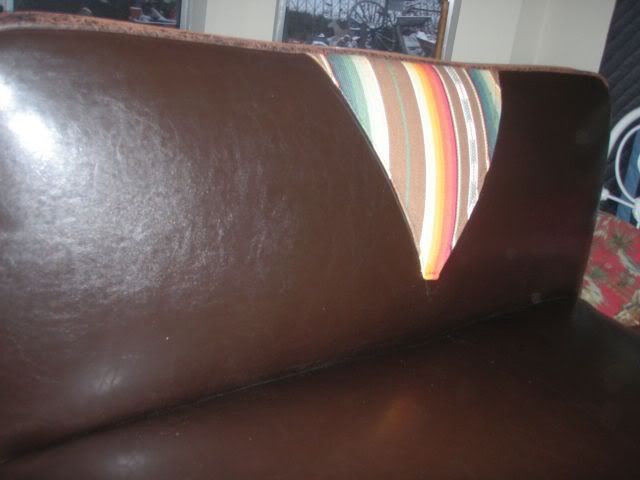
Here's what the new one's look like.


My photography does not do justice to how cool the leather and distressed leather along with Serape material accent look.

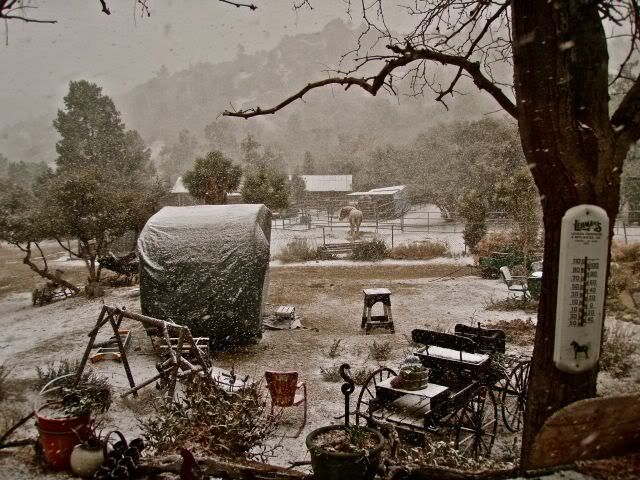
I'll leave you with the view we are blessed with every day of the year.  Ever changing but always spectacular. 


Monday, March 12, 2012

Some folks have asked about the wagon and horses in the background of one of our pictures of the Deville in it's parking area while we work on it.
Has nothing to do with the Deville but is a big part of our lives.
The '59 Deville  and the horses


We live in a rural area in the mountains and have had horses as part of our family since the 70's.  We even operated a rent string for a couple of years that catered to the summer camps in the mountain town where we live.  At one time, we had ten horses of our own but time and aging has thinned the herd to seven.  We have a combination of Belgian Draft horses, Haflinger Draft ponies and a Quarter Horse.

We just lost Fire...a big Polish Arab...that we had for 20+ years.  He was a gentle as a lamb but had the heart of a lion.


We rode a lot of trails together and he gave a lot of kids their first rides.


The Belgian Drafts are truly gentle giants.  We had four but lost Katie this year at 21 years old.  We have wagons and farm implements and Katie and JC were "broke the best" as our Amish friends used to say.


Here's a couple of shots taken at Bishop Mule Days over the years where we pull the BLM Fire Wagon.  They loved the crowds and would prance down the street proudly the entire route.


Katie is the near horse without the blaze.  She was the leader of our herd.


Our Halflinger's are very similar in color and disposition to the drafts but about half the size.  Very easy keepers and really like to be around people.  Belgians on the right and Luke, our first Halflinger on the left.
When it's brushing time, everyone wants in on the act.  You can get an idea of just how big these horses are as my wife is standing on a tack box and the girls have their heads bent over to be brushed.

So for those who have asked, we continue to enjoy our Equine and Canine family as we work on the newest addition...our 59 Deville. 

More about the progress I've made and some things I've learned.

Saturday, March 3, 2012

The progress is slow as I wait for the window of weather and a helper to tackle the front of the trailer.  Will Remove the tin...rebuild the frame work...install some wiring while I'm in there and put the birch paneling in to replace the rotted stuff.  I also have to replace one of the side birch panels right by the door.

We've made a new electrical diagram and will be running both 12V and 120 wires as I go and we open up areas.  Plan on putting a porch light of some sort and that will need some wiring.

As we work our way to the back, I plan on replacing all the cross roof braces with wider ones after each panel goes up.  Everything will get insulated with newer and better insulation then a vapor barrier and the tin goes back on.  I've been working on the doors and drawers and they are almost done. 

Here is a link to a video taken by Larry Walsh, from Canned Ham trailers.  It's a walk through he did before I had done anything but a few drawers.  Larry's series on  Restoring the Deville and Restoring The Shasta should be required viewing for anyone thinking of giving this a try.  Especially if you have the kind of skills I do!  It's been extremely valuable to be able to view one of the 30+ Deville videos and see exactly what I have in store next.