Monday, February 27, 2012

Just a short entry to share our pleasure with a cover we bought on EBAY for the Deville.  I think we paid under a hundred for it but it could have been a bit more.  We knew the trailer must leak and we live in a foothill area that sees a lot of snow some winters.  This winter had been mild but some years, we measure the snow in feet.  They called for snow today at well below our elevation and I put the cover on last night.

Here's this morning's weather....


Here's the beginning of the storm.  The horses always stand out in the snow....always.  Really used to trouble me that we gave them warm and dry shelters but they stood out with the snow piling up on their backs.  They have a built in cover with that winter coat they grow, I guess.


We were waiting to get the front end rehab started when we might have three or four days of good weather.  Maybe next week.

We have used the cover through several rain events and are very pleased with how easy it goes up (as long as the wind is not blowing like crazy) with one person doing it.  I use a ladder....roll the cover from each end to the center and place it on the roof in the middle of the trailer.  I move the rolls back and forward till gravity takes it over the edges and climb down to secure it.  Until I learned that rolling to the center trick, it could take me a bit with the wind blowing.

Next post, I'll share what I have discovered about doing my birch wood and what I have decided on.

Here's one of our locals taken out the front window...they enjoy the snow as well!


Friday, February 17, 2012

Part 3....Why We'll Do A Partial Rebuild

Part 3....
Why we'll have to do a partial rebuild will become evident in a moment.  We had hoped that there wouldn't be too much wood rot and mold but that was pretty much wishful thinking.  There was a reason the Previous Owner had put the non-matching oak paneling up over the birch and we were about to find out why.  There was oak on the front by the dinette...on the ceiling around the vent and in the rear by the gaucho bed.   At first glance, it didn't look too bad but it didn't match and there just wasn't the same amber colored patina that we enjoy.

The oak was screwed right over the original birch


I pulled down some screws in the front of the trailer and took a peek inside. I finished taking all the screws out and found a mess of mold, wood rot and insect carcasses.

Darn!  I knew there was reason for the extra paneling....
Front right corner of the trailer.  You can see the board that birch paneling had been secured to.  There is a cut in the tin about 1/3 of the way up and it had been covered with a vent on the outside.....obviously a while after the damage had been done.


The original birch is the yellowish paneling and this was where it attached to the floor board.  It was hidden by the oak.


Very spongy section of one of the 1 by 4 cross braces.

 Looking in the lower right hand corner of the front of the trailer again.
The boards that support the front end are crumbling.  The wood that the tin staples into and the J rail screws into is dust as well.

There was some rot and mildew on the left side as well.  The PO used copious amount of silicone goop and still couldn't keep the water out.


This is ceiling tin and supports that have some mildew and mild rot from water coming in.  They had put the Oak over the warped and mildewed birch...some evidence in the left side of the picture.  We're looking from door towards the kitchen cabinet.  The tin will have to be removed and we will reinstall birch and redo the supports while we're in there.  (Remember, I was thinking we could just get away with some sanding....shellac and upholstery...)

This is the aluminum brow that covers the front window.  It would have polished up nicely had it not been secured with copious amounts of that insidious silicone.  I have to get the window out before I can take the tin off to do the inside paneling and supports.


I tried nine different ways to get this stuff to unleash the brow but finally the only thing that would work was brute strength....a bread knife from my camp box and a lot of the seven words that you used to not be able to say on TV.   I spent over two hours removing this brow.  All I could think of was the door breeching explosives used by our troops and how that just might be the ticket.  The brow was destroyed in the process ( I have access to another)

The back of the trailer has the same issues and will be addressed next.  In addition, I noted a large and thankfully desiccated wasp nest complete with dead wasps by the rear tail light.  All in due time.

I'll leave you with a picture of another of the reasons why we love living in our little valley.  This young Bluebird has been hanging around for quite some time.  They really enjoy the pond and perching in the high places.


Thursday, February 16, 2012

Part 2...the "Before" photos

Part 2 of the "Before" photos of our 1959 Catolac Deville.  As I shared, the trailer itself is still pretty much all there.  Initially I thought we could clean really well....do some shellac and load her up to go.  On closer inspection, I realize that I might have been hasty in that judgement.  I'll share some of that in this posting.

The side is pretty straight but there are some small dings
We were very lucky in that all of our glass is intact and the Hehr windows work flawlessly.  Of course, the down side is that three of the windows were remounted with copious amounts of Silicone....the kind that small artillery could not dislodge.  Folks need to take a solemn pledge when they buy one of these canned that they will never...ever use a silicone product on the trailer.  I am looking forward to hours spent removing that goop so I can reseal correctly with butyl tape.

          Original water fill          


The shore water fill....electric shore power plug and water tank fill are all original.  All will need to be resealed.  The water tank fill and shore power, need some kind of shimming inside to pull the tin closer to get a good seal with the tape.

.  You can see the original side and back lights.  License plate light is not original.


The top has had issues with leaking.  Lots of silicone in places and the wood inside reflects that water had been leaking for a while.  The vent works well and there is a smaller vent for the sink...more about that later.  Both were sources for water entering the trailer at one time.
The j rail is in pretty good shape but the putty was dry and brittle.  I have already replaced all of that.

The reason the PO gooped this J rail up was there was water coming in.  The water was coming in because the wood frame was rotten and falling apart.  We'll fix all of the that in the coming weeks and months.

Dinette on the door side

The dinette upholstery was a bit on the rugged side.  The table will need to be rebuilt and recovered as well.  We have the upholstery done already and are very pleased with the final result.  the table was just some masonite with a paper covering that is coming up.  It will get a rebuild and new covering as well as a new table leg.

Propane light....needs cleaning up, mantle and globe.
Some people don't like these propane lights but we are very comfortable with them.  I found a complete spare on EBAY with intact globe so we are looking good on this.  We have a number of Amish friends in Ohio and they all use propane lights in their homes, barns and workshops.

Rear of the trailer...The Gaucho bed
How the gaucho bed slides back to make up a sofa


We have a gaucho bed in the rear that my wife would like to have made into a permanent bed.  We'll do that after doing the rebuild in the rear of the trailer.  Notice the Oak placed over the birch paneling?  There's a reason for that....rot, mold and wasps nests....lots of them.  Thankfully the wasps are dead.  The sink is to the right and the closet to the left.


We have a 3 burner Princess oven and stove


The aluminum back splash is pretty cool


The stove looks like it wasn't used much.  I will be placing some heat shields under it and next to the ice box as there is none now.  The back splash polishes up very nicely with aluminum polish and my buffing wheel.


Drawers, sink, icebox and stove.
And so it goes.  Part 3 will share some of the reasons I will have to be doing a partial rebuild on the trailer.  I was amazed what I found under the oak paneling.  Until then... thanks for sitting a spell.  I will leave you with another of the reasons we enjoy living in this wonderful valley we call home.

Yep....we get Hummingbirds that winter over each year

Wednesday, February 15, 2012


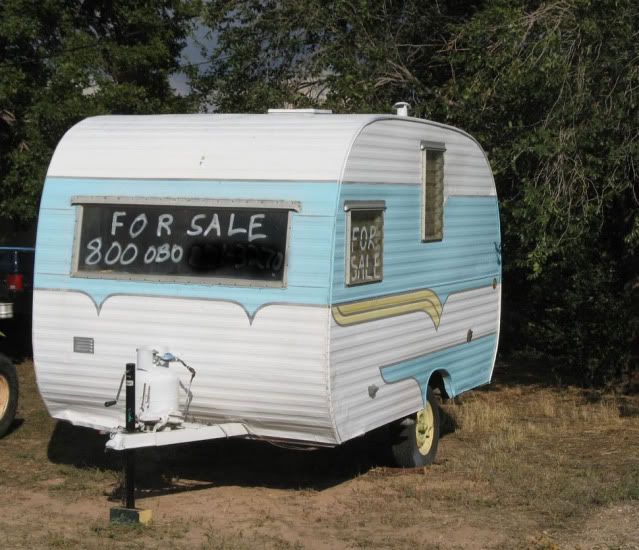
Here are some before pictures of our 1959 Deville.  Starting at the tongue, I was pleasantly surprised at how most everything was still pretty solid with little rust evident.


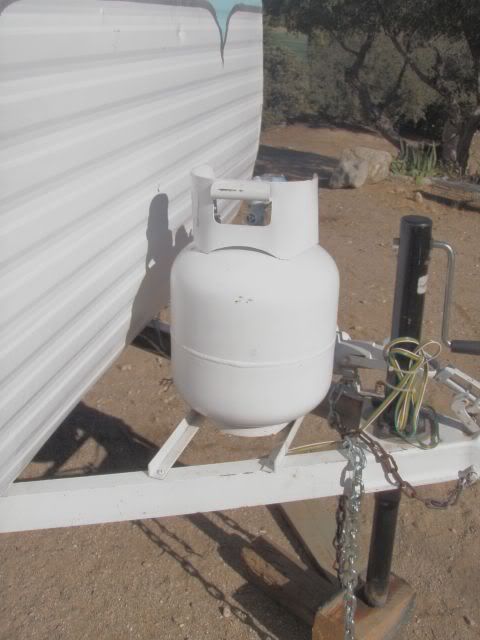
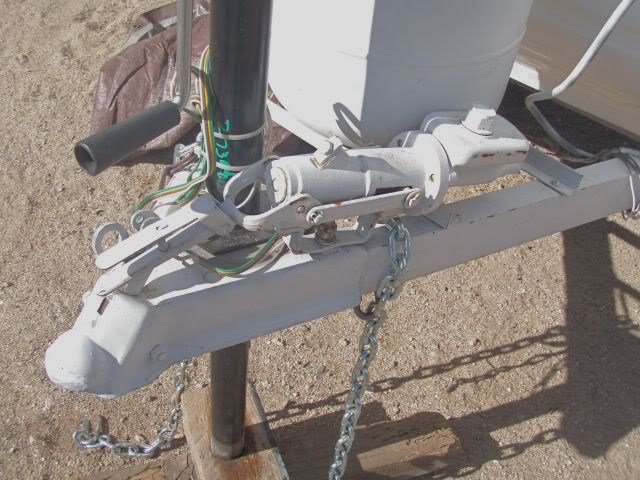
The tongue was straight and had the VIN stamped in the metal on the side.  If one were to use the same method of dating and establishing manufacture date as Shastas do, the trailer would be a 1952.  No one really knows as the PO only guessed when he made the forms out for the Utah DMV.  We'll figure it out one of these days.   The jack was brand new and on the side of the tongue was something I had to ask about to figure it out.


It was a hydraulic parking brake.  


You pulled the handle and the fluid went to the drums and locked them down somehow.  i took it off and will not be using it.

The chains we added to travel and I will be mounting them differently.


The original trailer wiring was not functional and we used a temporary setup that worked well.  All new rear lights wiring will be installed as we get to rebuilding the back end.

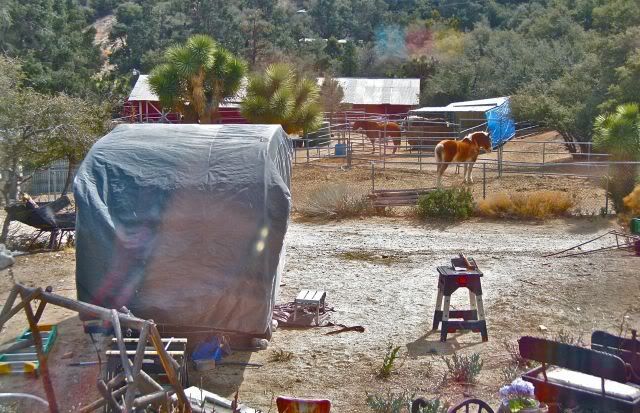
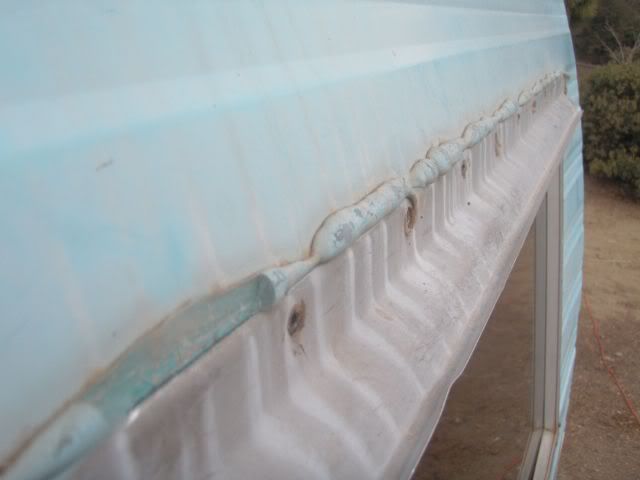
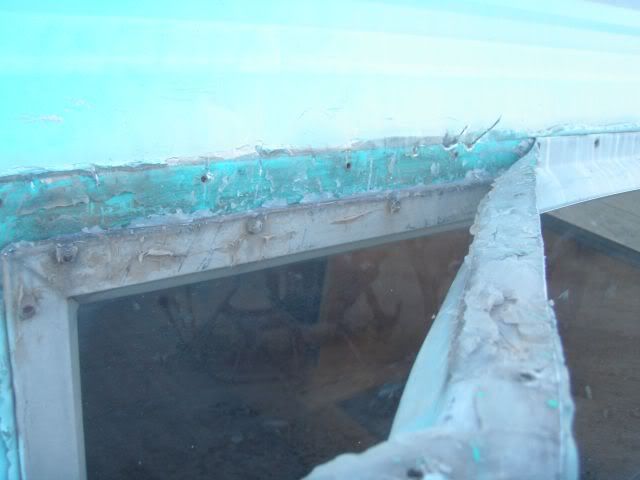
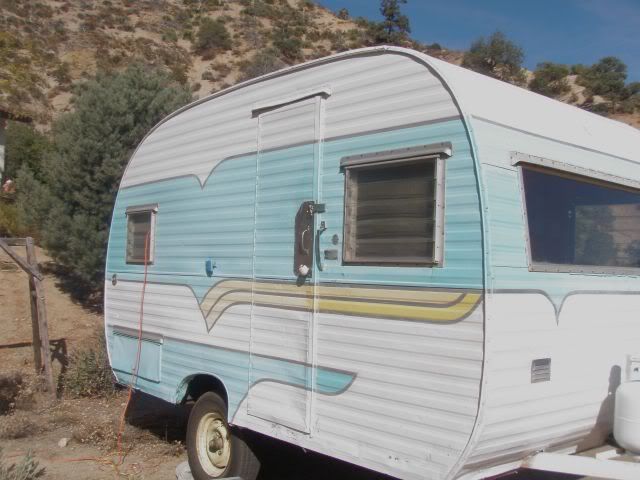
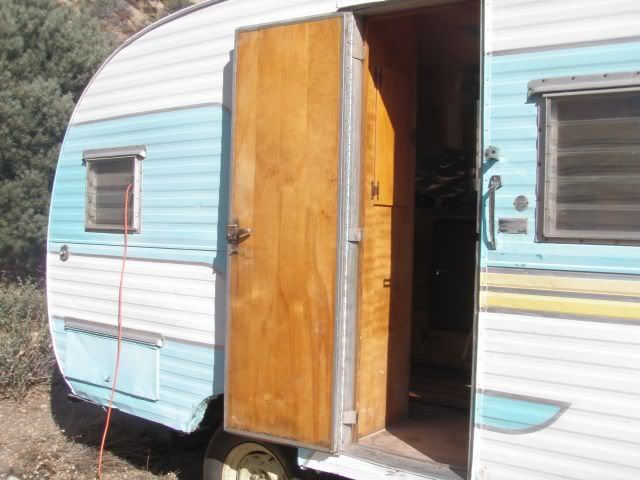
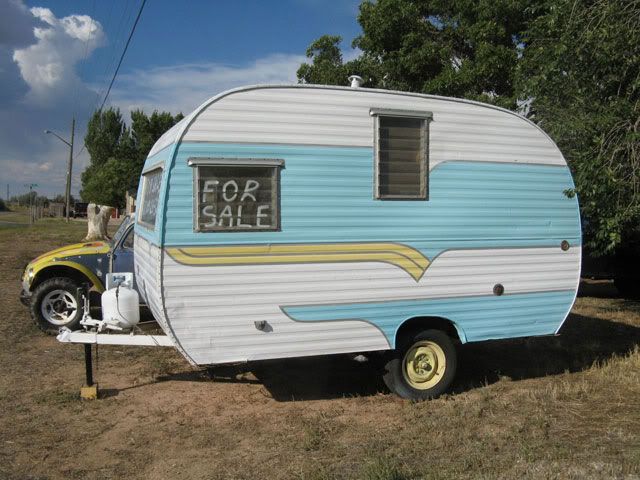
 The paint was in fair shape overall.  The striping and aluminum stripe were sharp.  There's some evidence that this is not the original color (original was a darker blue/green).  The axle had been rotated and you can see how high she sits.  Normally, the deville sits so low, it is hard to change the tire.  Since we live on a bad dirt road and plan on camping off of bad dirt roads, we'll keep it for now.  It also makes it easier to clean up the underneath.


The original door handle is missing on the outside but is original on the inside. They had an interesting sheet metal thing going and the door handle i very old.  For now, they work and they'll stay.  Looks like the original door handle.


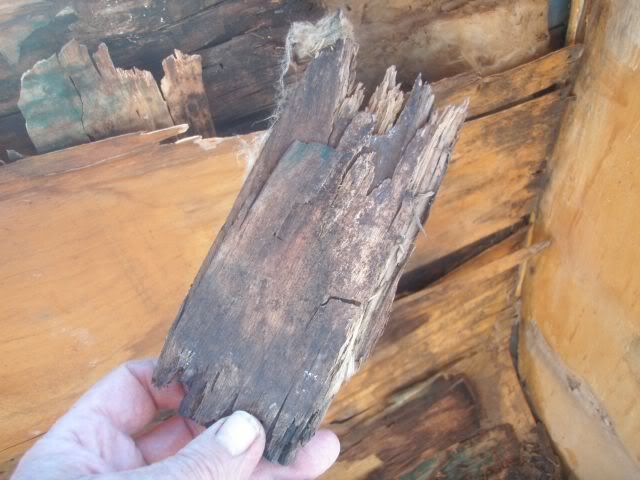
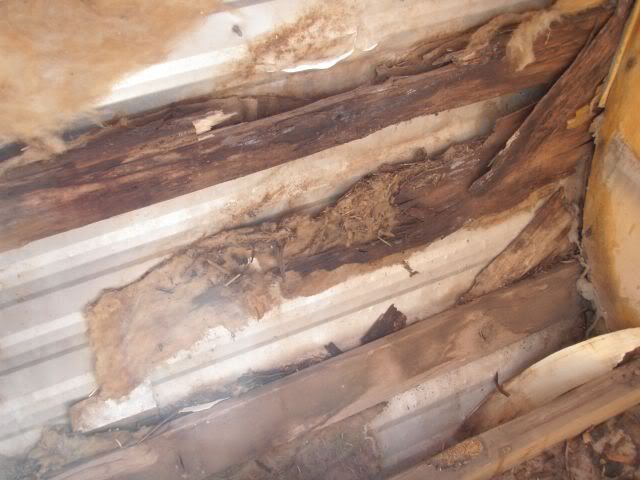
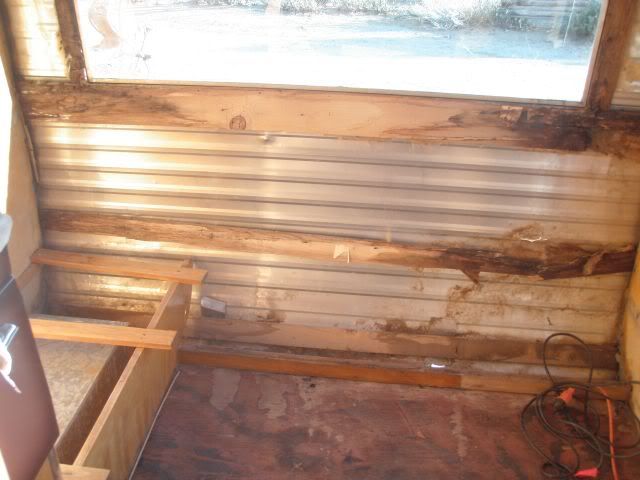
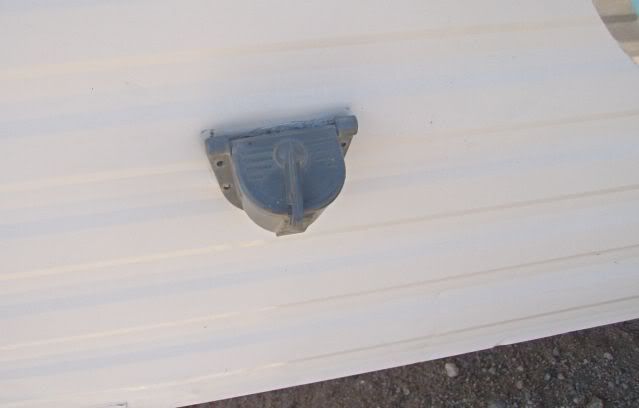
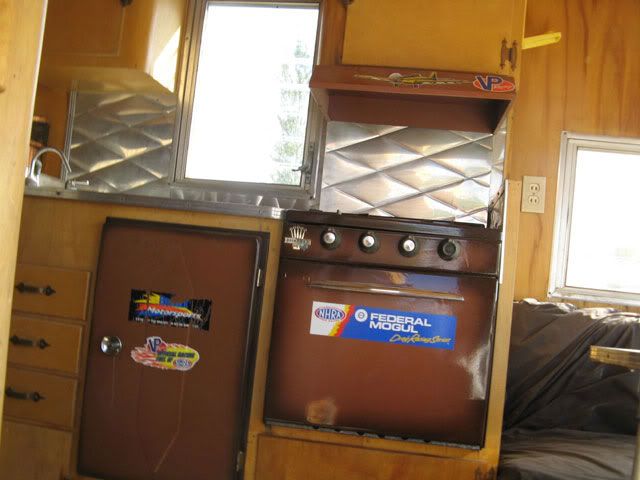
The inside door birch paneling has some  water damage at the bottom.  I will eventually replace it but again, more pressing things beckon.  The rear compartment door is pretty dinged up and will make a new one someday.  Latch works well.

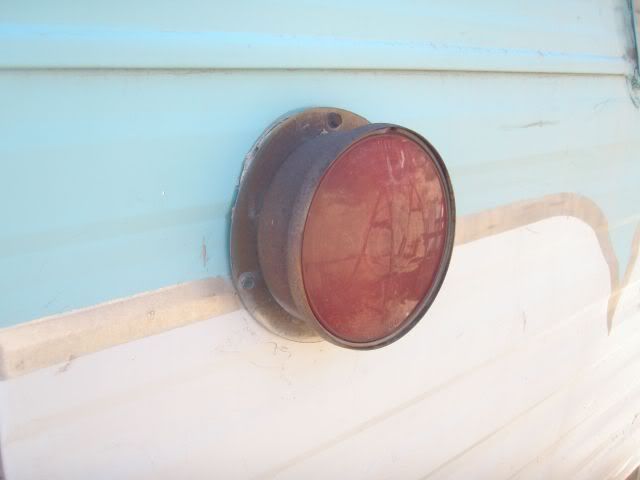
One of the tail lights.  Totally rusted and not working.  I have since pulled them out and buffed them out to near new looking and rebuilt the interior sockets with new springs and connections.  Amazing what the buffing wheel will do.....even makes the red glass look like new and it's 50 years old!

I wanted to share something briefly that I will elaborate on down the road.  If you are interested in restoring vintage trailers or campers, there are a number of wonderful web sites for you to go through and learn from.  One of the best and the one I refer to almost daily now is larry Walsh's Canned Ham  web site.  Full of videos and techniques that illustrate the twists and turns of restoring fifty year old campers.  He has a series of over 40 different videos that cover most every system and method for getting these old trailers back to their prime.  He's also quite an interesting character.  Bookmark this one:


This concludes 
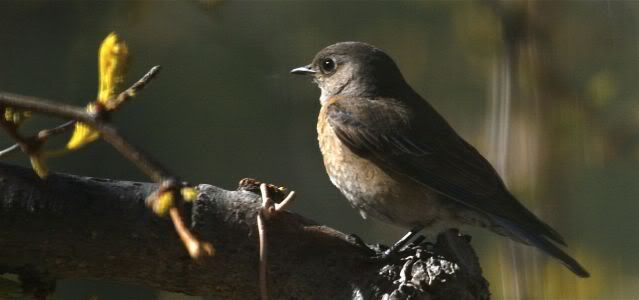
part 1 of the walk around and look inside of the "before".  I've got to tie some flies for an excursion to try and connect with some browns on Friday.  I'll leave you with this....It's a picture taken here at the ranch and something we are thankful for every day....our wonderful wildlife.  This little Bobcat was sleeping the afternoon away in a dead tree right behind the house.  The Ravens let me know he was there and he posed and snoozed for several hours before strolling off.

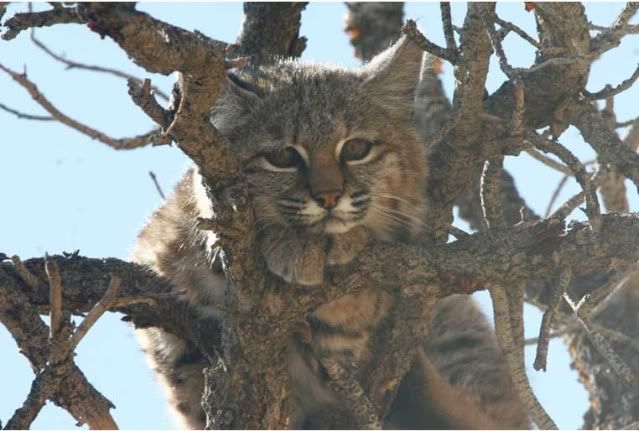
Saw a Mother and baby Bobcat strolling across our ridge at sunset last week.  They ambled like they owned the mountain....which I guess they do. 


This is an ongoing story about a 1950's travel trailer and our efforts to restore it back to using condition. It chronicles our purchase of a "Canned Ham" and our attempts to bring it back to using condition to simply enjoy and have fun with.  I am not a woodworker or craftsman but I am going to try and get through the restoration process with a minimum of frustration and angst.  I did enjoy doing the bright work on our 28' sailboat over the years but have never done a lot with my hands or tools. We do have a wonderful network of folks who are handy and who are craftsman including some folks that have done incredible restorations of these fun little trailers. 

My wife and I first became acquainted with the Canned Hams in the 70's when we bought a 50's Shasta that we used at San Onofre Surfing Beach and on a road trip to Washington State (during the Mt. Saint Helen's eruption.  We loved the wood and the utility of it and eventually sold it for more then we paid for after a number of years.

My wife was in Utah this year and called to say she had found a trailer in a vacant lot very similar to our old one.  Looked fairly clean and intact.  Here's a picture of where she found it as they were just driving by:

There she at...in a fellow's lot with shoe polish signs in the window
She sent me a phone picture and said they were asking $800.  I said offer five and see what they say.  Well they said yes to $500 and we were the new owners of (what they called) a 14' 1959 Shasta trailer.  Two new tires and a bearing repack and she towed it back  to our home on the eastern slope of the San Gabriel mountains.  We parked it out front of our house for easy access to work on it and started to inventory what we had to work with.  We bought a water/snow repellent cover as we live in an area that can get several feet of snow.  I also began to research what we had bought and how we were going to fix it up.

First thing I discovered when I checked the VIN number on the tongue was that this was no Shasta....it was a Catolac Deville that was made in El Monte, California.  If you believed the VIN number... it was made in 1952 but according to some folks who have worked on Deville's, they think the 1959 number might be accurate.   No matter to us but someday I would like to solve the mystery of when the trailer was actually built.  Here's a few more pictures from the Utah lot:

I told her to offer $500 cash and walk away if he didn't take it.    He took it
The paint job looks in pretty good shape and the body has small dings but nothing major.  The interior looked pretty good at first glance.  More on that to follow.

I'll post more pictures of our initial findings and how things have evolved.

I'll leave you with a picture taken on our front porch here at our place.  We are already blessed to live in a beautiful surrounded by nature.

Our morning coffee view....